Avoid dragging and throwing the boards while loading and storing. Facade boards should be stored horizontally on their flat surface, preferably in their original packaging, on a dry and level surface or on 50mm wide wooden posts with spacing not exceeding 500mm. Store in a well-ventilated room.
Required materials:
Work equipment:
To cut WPC, regular wood cutting devices are suitable. Large tooth saw blades should be avoided.
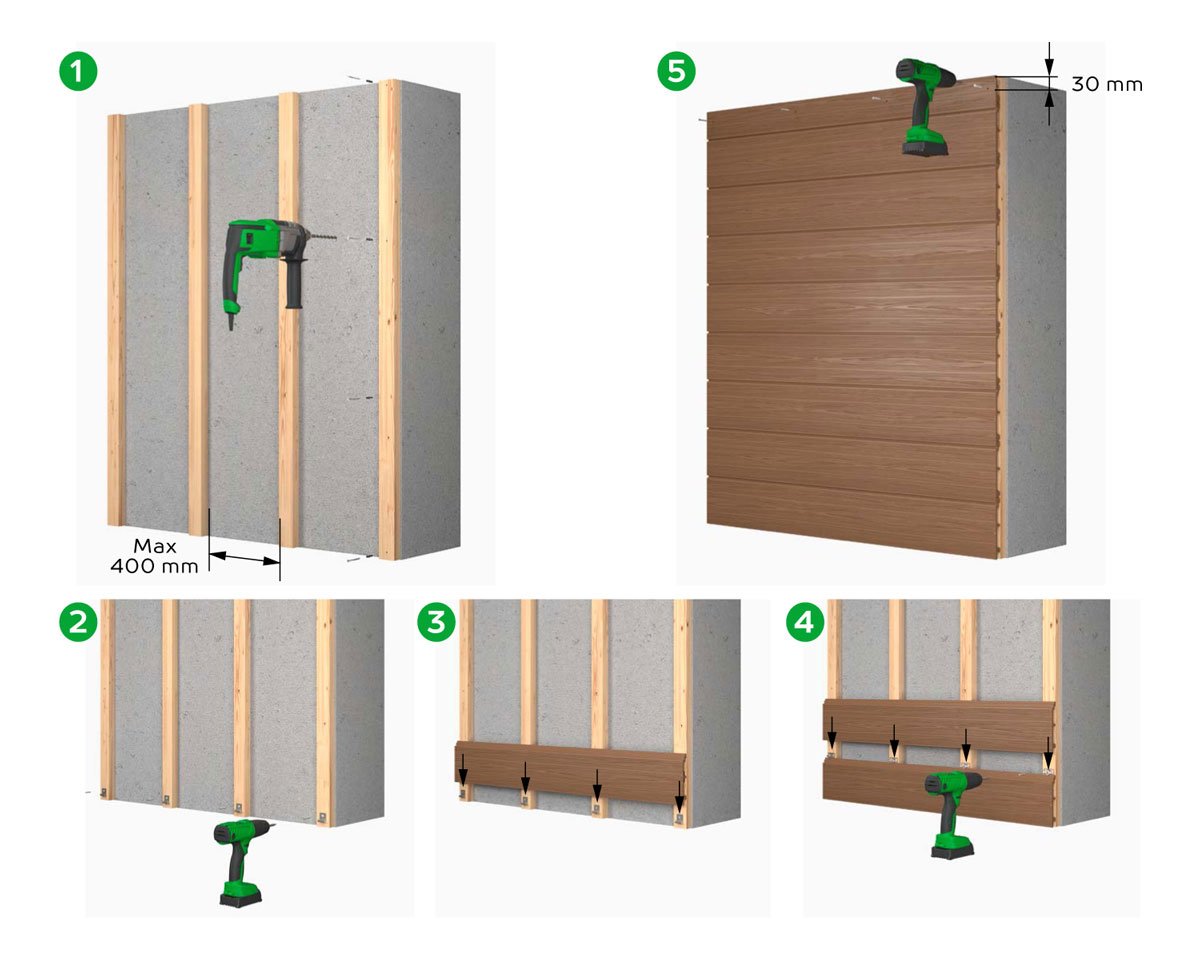
Regular wooden beams are suitable for the base framework. Beams should be installed at intervals of up to 400 mm. Where one facade board ends and another begins two beams must be installed side-by-side. The outermost beams should be installed so that the facade boards do not extend more than 30 mm over the edge of the beams.
Most of the boards we supply are designed to be fixed using concealed starter or fixing clips.
However, where boards require fixing with screws, it is always necessary to pre-drill the screw holes into the WPC material.
The drilled hole should be smaller than the diameter of the screw. For instance, for a 4mm diameter screw, the drill should have a 3mm diameter.
During the drilling process the drill should occasionally be drawn out of the drilling hole to remove any residue.
IMPORTANT: Leave an expansion gap of 5 mm around any obstructions, abutting walls, etc.
Solid Core Edge Board 150 x 20 x 4,200 mm is suitable for finishing external corners. An expansion gap must be left between the facade board and the edge board. If it is intended to cover the expansion gaps, Edge board Basic 78 x 14 x 4,200 mm is suitable for that purpose. Fixing screws for edge boards should be installed every 400 mm and distanced from the edges by at least 30 mm.
Internal corners can be finished without additional boards. However, if it is intended to cover the expansion gaps, Edge board Basic 78 x14 x 4,200 mm is suitable for that purpose. Fixing screws for edge boards should be installed every 400 mm and distanced from the edges by at least 30 mm.
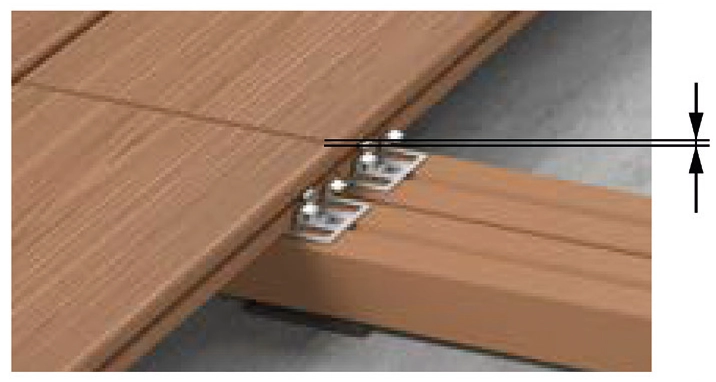
At the points where one facade board ends and a new board begins, two base beams should be installed side by side. A expansion gap must be left between the ends of the facade boards. If it is intended to cover the expansion gaps, Edge board Basic 78 x 14 x 4,200mm is suitable for that purpose. Fixing screws for edge boards should be installed every 400mm and distanced from the edges by at least 30mm.
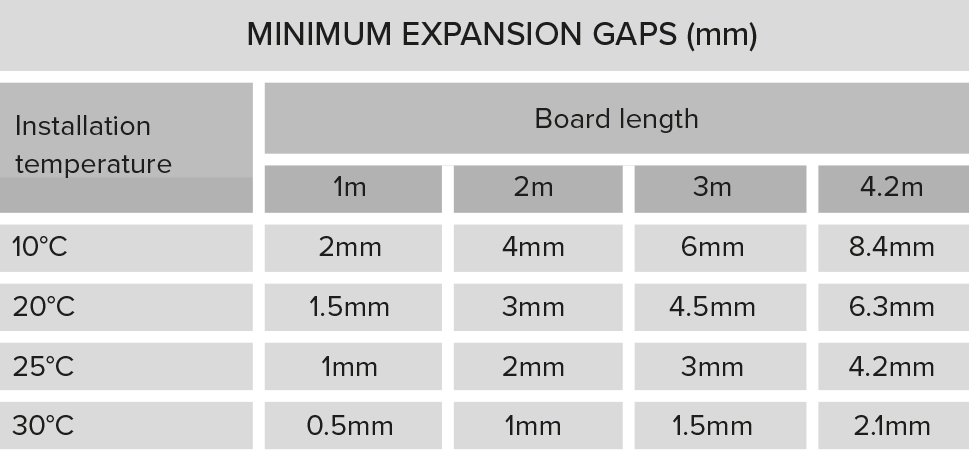
Ensure correct expansion gaps are left at the joints dependant on the outdoor installation temperature. Minimum recommended gaps are shown in the table.
Dakota Living’s WPC cladding materials are incredibly low-maintenance, especially compared to traditional wooden facades. You’ll never need to spend time or money on staining, oiling, or sealing. To keep your facades looking beautiful, all that’s needed is a simple periodic cleaning with a brush, soapy water, and a sponge or pressure washer.
INSTRUCTIONS FOR MAINTENANCE
PLEASE NOTE:


